Anne Hamilton: the event of a thread

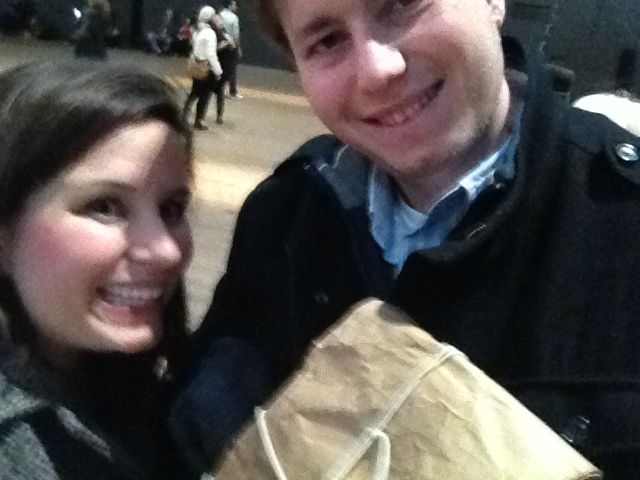
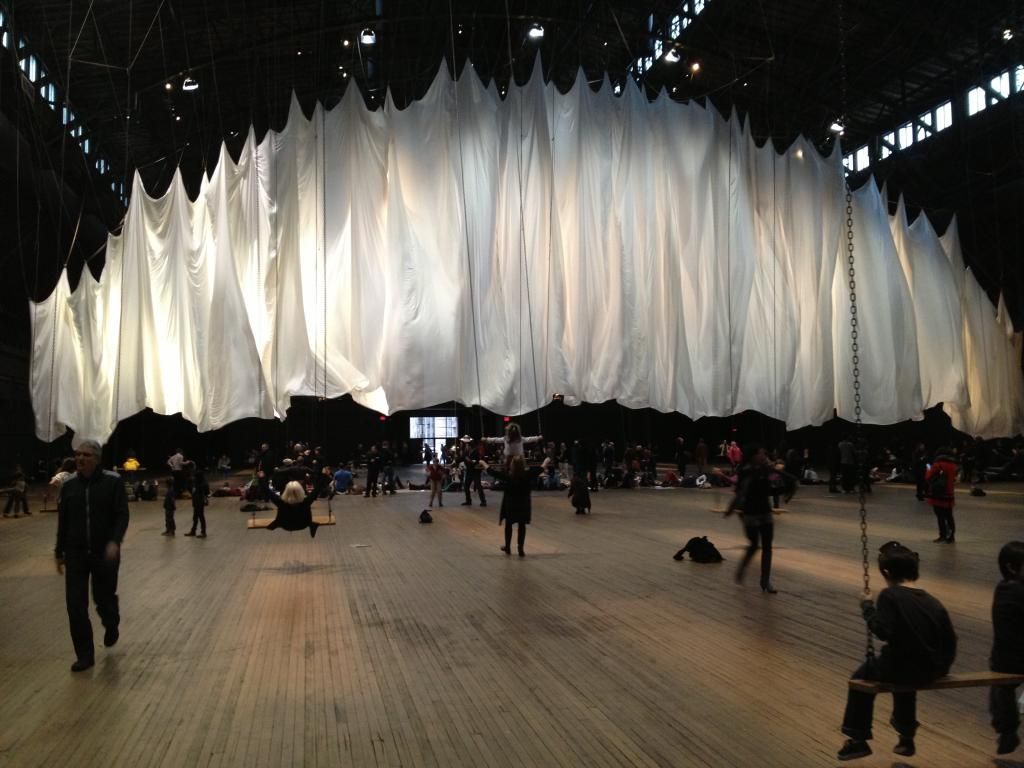
On Saturday, John and I went to see the new instalation at the Park Avenue Armory, Anne Hamilton's the event of the thread. I've never been to the Armory, but I think it might be my new favorite building in all of Manhattan. Especially at Christmas time!

The Wade Thompson Drill Hall at the Armory is gigantic and its filled with swings connected to strings connected to a giant white sheet. When you walk in, two people are sitting at a table covered in cages of pigeons. Their quietly reading giant scrolls of paper into an old fashioned microphones. Their voices come out of parcels all over the room that you can pick up and move, which was neat.


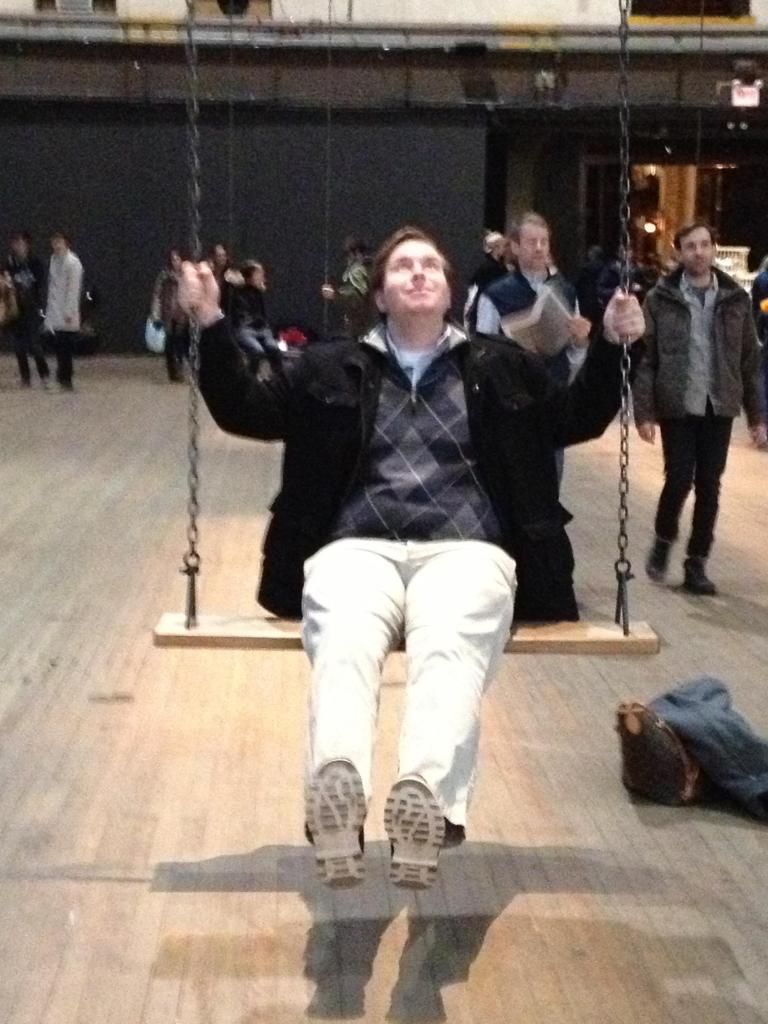
The best part of this whole thing obviously is that you get to swing on these giant swings! I even convinced John to ride one with me and then by himself!


If you look up while you're swinging, you can find the wire of your swing that attaches to the sheet and watch it move as you swing!


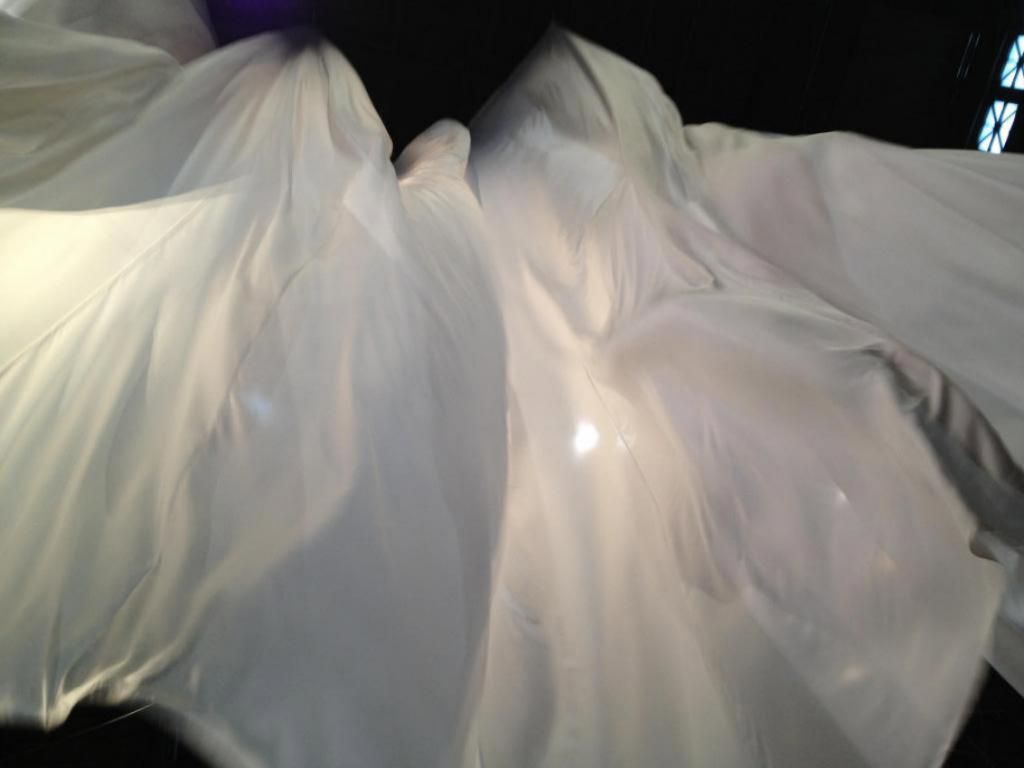
You can also lay under it and watch it dance above you. It was so much better than I thought it was going to be!


And now, here are a million pictures of me swinging like a child. If you're in the city between now and January 6th, you must, must, must go. Highly recommended!

Merry Christmas to YOU

Wishing you and your family a very Merry Christmas.
xx,
Kate 

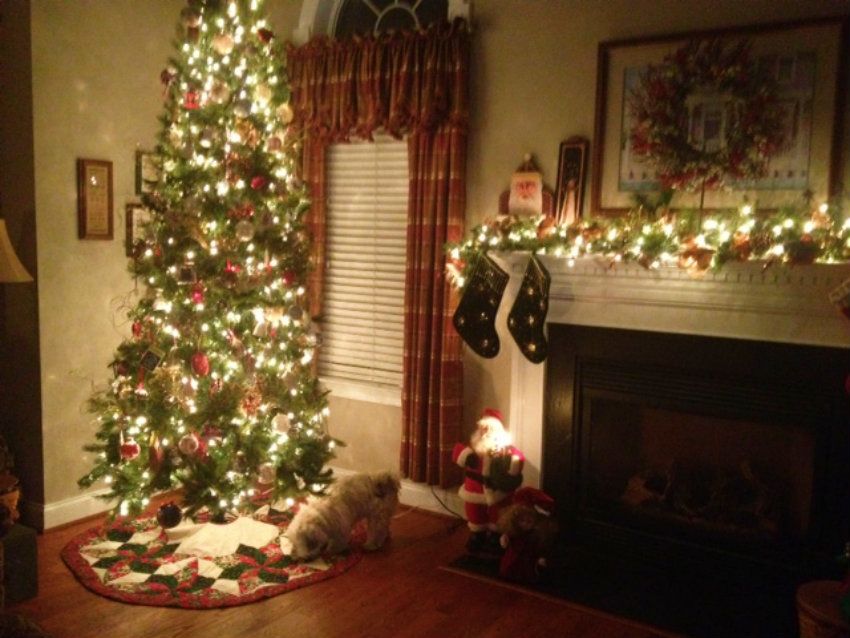
PS: Holly loves our tree


Obligatory End of the World Post

In case today is actually the end of the world, I wanted to say farewell to you. If its not the end of the world, I wanted to say AMEN BABY JESUS (you know, because its Christmas time) it is the last day of work before two whole weeks of (paid) vacation. And hot damn I get to leave work at 4:00.

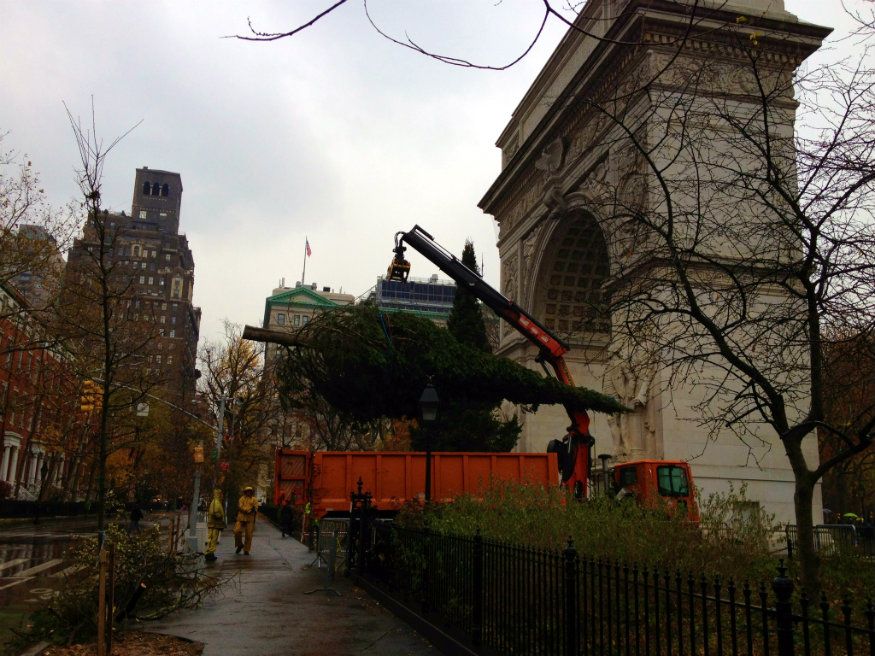
I wanted to share my very favorite Christmas-y picture with all of you, too! From a few weeks ago on my walk to work when they were getting Washington Square Park all gussied up for the holidays!


Also what if the world ends and this is the last picture I ever took? Well wouldn't I be embarrassed?


Happy End of the World to you!

DIY Christmas Tree Garland

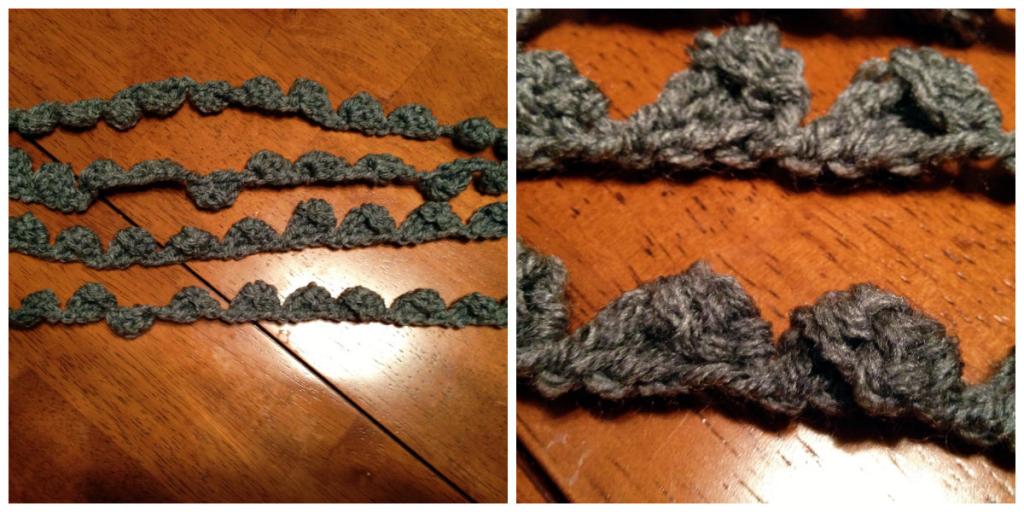
Well I'm about to do something I never thought I'd do on this blog. I'm going to give you a crochet pattern. For ADORABLE Christmas garland for your tree! 

You're welcome/I'm sorry, depending on your feelings about crocheting. 

Easy Crochet Christmas Tree Garland
Adapted from here

1. Make a loop of yarn around your crochet hook, leaving a three- or four-inch yarn tail. Crochet three chain stitches
2. Double-crochet (dc) three times into the third chain stitch (the first two chain stitches count as first dc) for a total of 4 dc
3. Chain three, turn work, dc three times into first chain stitch (remaining two chain stitches count as fourth dc). Repeat until garland is desired length

4. Cut yarn, leaving about three inches of yarn tail. Remove the crochet hook from the last loop and slip the tail of yarn into the loop. Pull to tighten


One Year Blogoversary!

Today marks one year that I've been blogging here at Ummm Now What!

What started as a follow up to a Tumblr account ended up being so very much more. I can't thank all of you for reading, commenting and sharing. Its still a crazy to me that people I've never even met read my babbling in this silly space.

And now to commemorate my first year, 12 of my very favorite posts from the past 365 days!
Thank you again for reading!
xx,
Kate 

Reasons to Love New York: Where Christmas Trees Go to Die
Book #3: An Object of Beauty
One of the MOST Offensive Things
365 Years of Engagement
Reasons to Love New York: Last Night I Got Checked for Explosives
Kate and Lenore Take Philadelphia 
A Nick Kristof Follow Up
Flea Food
In Which Street Signs are Important
Surprise Baby: Jonathan Matthew
We Can Do Hard Things
Birthday Chicken and Waffles


How to Impress at Your Office Holiday Party!

Last Friday, my office hosted its annual holiday potluck. Last year I was relatively new in the office, and didn't fully understand the scope of this tradition. I can't even remember what I brought (soda, maybe?) which obviously means that it was lackluster.

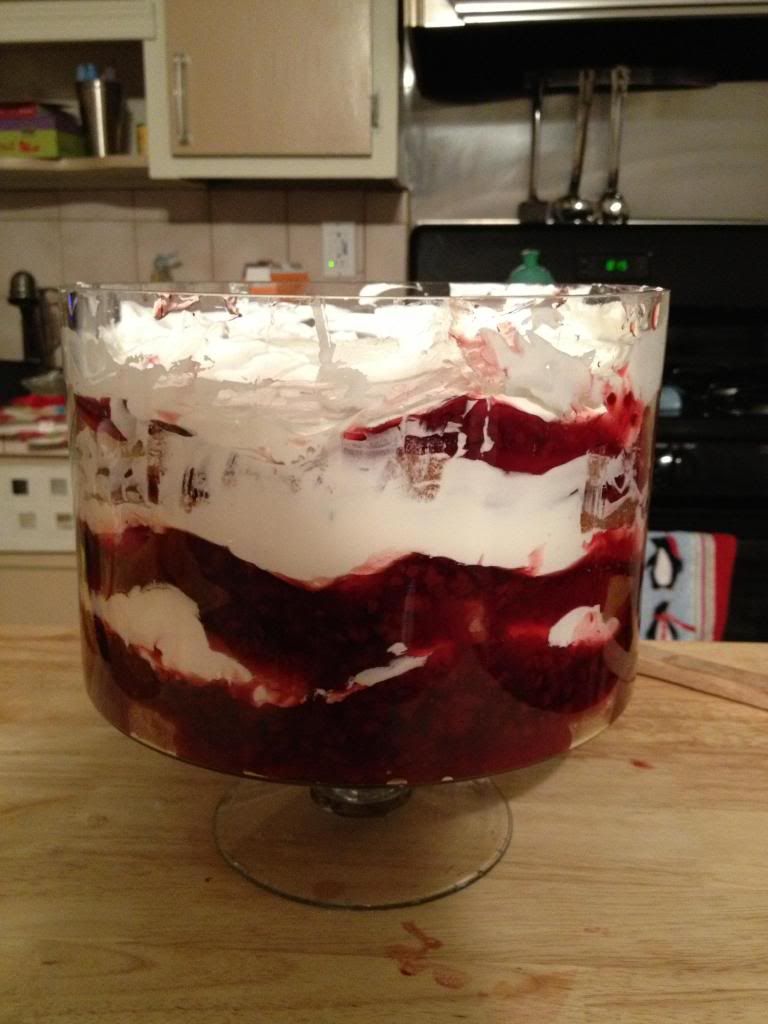
This year I knew I had to step it up. Yet on Thursday night, I had zero desire to bake something. So I present to you, an assembled dessert.

"Homemade" trifle requiring zero baking. You don't even have to go near your oven! Here's what you'll need:

Ingredients: 
-Trifle bowl (my Aunt Kathy bought me mine and I found this one for you in case you need one. Its totally necessary for the wow factor)
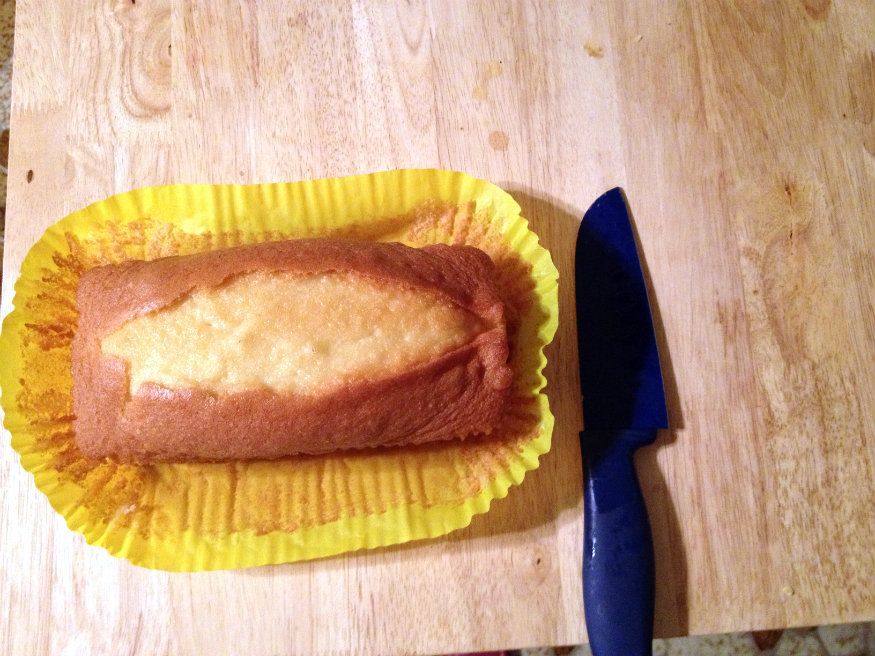
-Entenmann's pound cake
-Cool Whip
-Pie filling (of any flavor, I used raspberry but cherry, blueberry or apple would work, too)
*Note: you can really do this with any flavors. I've also done brownies and pudding and it comes great.


Here's what you do:

1. Take the pound cake out of the box and cut it into half inch slices


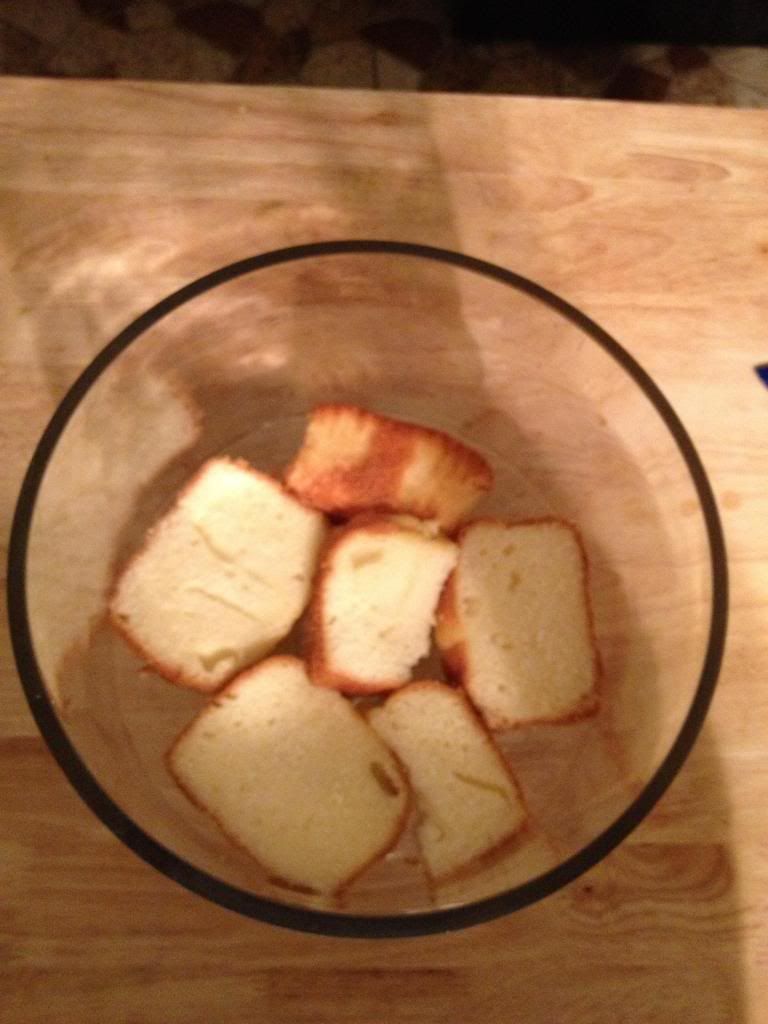
2. Place slices in the bottom of the bowl. You're going to have spaces that aren't filled with cake. Fear not!


3. Open can of pie filling and layer approximately half the can onto the first layer of cake


4. Open Cool Whip and layer on top of pie filling. You're going to have to eyeball it at this point and don't worry if some of the Cool Whip gets pie filling in it. It happens...there are more layers to disguise the error


5. Repeat! After Cool Whip, make another layer of cake, followed by pie filling, followed by more Cool Whip. Make as many layers as will fit in your bowl. I bought three of everything, and ended up with a lot of extras, so I made us a Travel Trifle for our trip with friends to the Catskills

You're going to see trifles on Pinterest that look perfect. No trifle I have ever made looks like that. The layers are messy and a little smudged. But trust me, no one cares. The whole thing went at the potluck and I've already told our Administrative Assistant she'll be getting a cherry one for her birthday in March. Good luck and happy office party season!


Another Reason to Hate the 6 Train

Let's talk about the subway for a minute, OK?

I find the 6 train to be horrendous. I don't ride it often, but when I do all manner of things seem to go awry. For instance, the light up board tells me that an uptown 6 will be there in 3 minutes. But 45 minutes later, I'm still waiting on the platform with 5,000 other subway riders. Or I'm on my way downtown and I somehow get stuck juuustttt past the Hunter College Stop, in the tunnel. Which means you cannot escape. You just sit there in the dark tunnel with your subway neighbors for 25 minutes until you start moving again (this has happened to me a lot...once three times in one week).

Or its last Saturday and you are at the Union Square stop waiting for the 6 to take you to SoHo to babysit (yup friends...babysit) and you see THIS!


I feel like I must have taken the 6 from Union Square before, but I have never seen this TERRIFYING SITUATION. Do you see what that says? It says "Stand Clear of the Moving Platform".

Is it clear to you what part of that platform is going to be moving? Because to me, it was totally unclear. Do I stay away from the edge part that looks like teeth (which is too close to the edge to begin with) or can I not stand where that writing is?

There was a girl standing right near those words and she had on those feather eyelashes and she was on a date with a man in orange pants and brown pointy shoes and I wanted to yell "MA'AM YOU HAVE TO MOVE, YOU MIGHT FALL OVER THE EDGE WHEN THE PLATFORM MOVES AND ORANGE PANTS HERE IS TOTALLY NOT SAVING YOU".

I was literally hyperventilating with Ira Glass of This American Life speaking to me in my ears. I need you to know that I literally waited less than two minutes for the 6 train to get there. In the span of 120 seconds though, millions of terrible platform moving images flew through my head. But then the train arrived and all that happened was that those teethy things moved out about six inches. And they didn't even move to close the gap between platform and train until the train was stopped in the station.

I felt totally duped by the 6 train. It had me terrified for six measly inches. And so, I entered the train, removed my scarf because I was terribly warm from the 2 minutes of terror I had just experiences and proceeded onto SoHo.

One day I will get you 6 train. One day.

Happy Weekend to YOU! 


The Met


Last Saturday we went to The Met with (my) soon-to-be-inlaws! Fiance wanted to see a new exhibit "Faking It: Manipulated Photography Before Photo Shop" . The below photo is the only one I was able to take of the whole exhibit because photographs were not allowed! Which I thought was pretty ironic.


That didn't stop me from taking a million pictures everywhere else we went in the museum, though!


This was absolutely my favorite even though I don't really understand Pop Art. It was a constantly replenished candy pile. And you got to take one! I have to say it was pretty!


And then I made us take pictures in front of the tree! Also, I learned to use Photoshop. You're welcome!


Photo Vomit

You know those nights when you drink too much? And then you get the word vomit? Or its more violent cousin word diarrhea (none of my friends like that I coined this term, but I think its a keeper). Maybe its Wednesday night and you go to Happy Hour with your coworker and you accidentally spill a pet peeve you have about a coworker. Or maybe you're at a cocktail party and you accidentally tell someone you lost touch with how much you miss them even though you do not and a week later you're getting dinner with them because whoops...word vomit.

Well that's what happens to me when I go to an Etsy sponsored event. Except its not words and drunken-ness, its pictures and imagining how adorably perfect my home would be IF ONLY I COULD BUY EVERYTHING!


On Friday (after a partiularly hellish day at work) Amanda (knower of all Etsy events) and our other work friend, Marni, went to the Etsy pop up shop in SoHo. It was slightly less terrific than the wedding expo last spring, but seriously how could you beat cupcakes and fizzy beverages at 12:30 on a Saturday?

And now I would like to offer some advice to the Etsy people:

I AM AN IMPULSE SHOPPER! While my wallet appreciates the fact that I can never purchase anything at your events, I would like to have purchased those animal heads. And most likely that tiny succulent for my Mom and those little yellow ball-y things for my windowsill. And now it is almost a week later and I have bought none of those things. And I probably won't because I had to ask myself the question "Do I really need that giant gold moose head?". And the answer was NO, Etsy folks.

But holy crap, he (the moose) would have made me feel a million times better on Friday night and he would be so cozy in our living room. Try harder next time, please?


A Conversation with My Mom

Today, I'd like to start your weekend with a conversation I had with my Mom this week. Where I'm nearly certain she insulted me. That's not to say that we didn't laugh for twenty minutes after because it was a pretty sick burn, as the kids would say.

Mom: When is John coming home tonight?
Me: I think he said midnight
Mom: And you have to leave for work at 7:15 tomorrow morning?
Me: Yeah, I have an early meeting
Mom: And John will be asleep when you leave?
Me: Probably, he's not getting home until midnight!
Mom: You two are like two ships passing in the night...well, more like two tugboats. You two are two tugboats passing in the night.

And a very happy weekend to you, too!

Our Very First Holiday Card

I cannot even BELIEVE that I convinced Fiance to get Holiday cards this year. And not JUST Holiday cards. Holiday cards with our picture on them! And Icelandic horses! It was a Holiday miracle!

I think next year I am going to write a holiday letter. I imagine that it will go something like this:

"Dear Family Member/Friend/Acquaintance,
In November we got married! Something about work, Dilly, Dilly, Dilly. Something about a trip we took, Dilly, Dilly, Dilly.  Something about our house, Dilly, Dilly, Dilly."

You know, Cat Lady stuff. Do you have a Holiday Card this year? I'd love to see it!


Find other Embrace the Camera Posts here

Happy 21st Birthday, Alyssa!

Today my baby sister, Alyssa, is 21.

When Alyssa was born, I called her Penelope. This was before Penelope was a trendy name. I thought it was the best name ever but my Mom did not agree and told me five weeks into Penelope's little (then) chubby life that if I didn't call her Alyssa I couldn't talk to her anymore. I plan on retaliating by naming our first baby Penelope (but only if I can get Fiance on board first).

On Sunday we all went to Nanny's house to celebrate the big 2-1! We ate Chinese food for dinner (Alyssa's fave) but I messed it up because I forgot to order her crab ragoon and shrimp toast. Worst sister ever.

Can we talk about this picture for a minute? Its basically my new favorite picture of me, Alyssa and our photo-bombing Mom.


Oh and this one is a real winner, too.


Instead of a cake for her birthday Alyssa/Penelope wanted donuts from Leskes.


Now seems as good a time as any to talk about Leskes. Recently reopened at 7612 5th Avenue in Bay Ridge, Leskes makes what I think are the best donuts in New York. Dare I say it in the country, they are that delicious.

I would highly recommend the Peanut Butter and Jelly variety (pictured above) or the Peanut Butter and Chocolate. NOTE the Peanut Butter and Chocolate are NOT Nutella flavored. No matter how much like Nutella they may taste. If you call and ask to order Nutella donuts for your daughter's 21st birthday, the counter lady will tell you (rudely) that they DO NOT MAKE NUTELLA DONUTS (I know because this happened to my Mom and then my Aunt).


Here are two other pictures from Sunday that I love, love, love!

Holly looking like a creeper!

Three of my favorite boys!


Happy 21st Birthday to the best sister in the entire world! Now when you drink all that wine, it won't be illegal! I mean...I love you, I love you, I love you!


Oh Christmas Tree

On Sunday, after we accidentally slept too late, Fiance went to the store and bought us a Christmas tree.


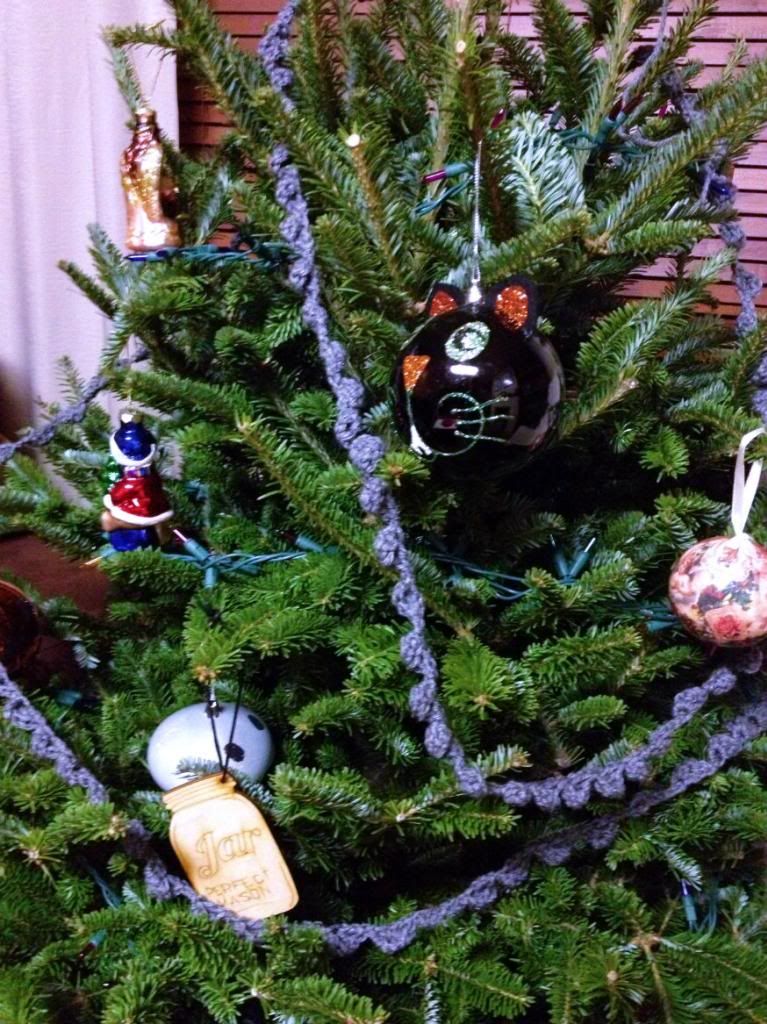
Not just any Christmas tree...our very first Christmas tree! Isn't it cute? Its a miniature one and I would like to name it but I can't really decide what it should be. I'm thinking maybe Maude? Or Chuck? Does it look like a man or a lady?


Luckily my soon-to-be-mother-in-law had given us some Christmas ornaments a while back and Fiance bought us some lights. I'm also crocheting us some grey garland...I know, I know, but its the only yarn I had available. Next year we'll go for something a little more festive...which is basically anything other than the color grey.

I really need a tripod for my iPhone. I know that sounds crazy, but how many blurry selfsies can I put on this blog before you all start yelling at me? Also Dilly is the WORST at pictures. No amount of kissy noise making, snapping, or yelling "DILLY LOOK OVER HERE!" can make this cat cooperate.

And so I present to you our first family Christmas tree picture with a distracted cat.


5 Years

Friday was me and Fiance's 5 year anniversary. FIVE YEARS you guys! That is a long time!

Fiance had to work late and then ended up working later than that. Suddenly it was 10:45, I had on lipstick and he still wasn't home. Thankfully, he walked in at 11:00 giving us an entire HOUR left of our anniversary! We were pretty excited...maybe more excited than we should have been?


Our original plan was to head to one of the bars in our neighborhood but we knew that at 11:00 on a Friday they would be super packed. Because we are basically retirees, we went to the diner instead and got milkshakes (vanilla for me, chocolate for him) and french fries. Thankfully the diner was open until midnight and the host took pity on my lipstick wearing self and let us in!

Then we went home and accidentally took comas until almost noon on Saturday. HOORAY five years!


DIY Mugs

I saw this post a few months ago on one of my all time favorite blogs, A Beautiful Mess, and I knew I wanted to try it! So, while I was home for the weekend, my Mom and I made them! We made one for my sister too, even though she went out with her friends while we were making them (geeze, Alyssa!).

Here's what you'll need:
1. Ceramic mugs (we got ours in Kmart)
2. Sharpies (of any color buy we chose black)
3. Blue painter's tape
4. An oven


Instructions: 
1. Figure out what you want to write on your mugs. We chose an Eleanor Roosevelt quote because she is our absolute favorite! "A woman is like a tea bag; you never know how strong it is until it's in hot water"

2. I put painter's tape around the mug for the first one we did because I wanted it to be super straight. If you have a pretty steady hand though, you definitely don't need the tape and I didn't use it the second time around


3. NOTE: if you mess up, was your mug with warm water and soap! All your writing will come off and you can start over

4. Get to writing!

5. Bake in the oven at 350 degrees for 30 minutes. After they were done, we turned the oven off and left them in there over night, just to be sure we didn't burn ourselves


I used mine yesterday morning with some orange juice! I would recommend not washing them in the dishwasher, but since Fiance and I don't have one, that won't be a problem for me! Thanks to Elsie and Emma for this great idea...their blog really is fantastic and I would recommend it for all kinds of craft inspiration and instructions!


Wedding Wednesday: How to Ask Your Bridesmaids to Be Your Bridesmaids!

Since we got engaged, I've been searching high and low for an adorable way to ask my six bridesmaids to be bridesmaids. I needed something relatively easy because I am not an expert crafter, and also I have nearly no patience. My biggest fear was that I was going to finish four of the six crafts and then tucker out.

The key to a good bridesmaid craft is to make sure you've asked your Maid of Honor (in this case my sister, Alyssa) to be your Maid of Honor. I found that they will definitely say yes if you buy them the Kate Spade MOH pencil/makeup/electronic accessories case. Once they say yes, they HAVE to help you craft! Silly MOH! 

SUPPLIES:  
1. Eggs
2. Glitter
3. Glue 
4. Martha Stewart craft supplies (that you won't even realize you need until your in Michael's) 
5. A dissection kit...Alyssa just happened to have this in her bedroom from her Biology class last year. It proved immensely helpful! 
6. Ribbon and sparkly tape 


INSTRUCTIONS: 
1. Blow all the goo out of the egg. Instructions for this can be found here 


2. Rinse eggs with warm water and dry in the microwave for thirty seconds (don't touch them because they are surprisingly hot!)

3. Let eggs sit for four hours 

4. Tape one of the holes closed with scotch tape (the hole where the goo came out of). In the other open hole, funnel (silver) glitter in...you're going to need to figure out the best way to do this. Alyssa and I cut a straw in half and I poured glitter down the straw slide while she held it against the egg. Once you think you have enough glitter in there, tape the other hole closed

5. Fill a bowl with glitter 


6. Put glue all over the egg and roll the egg in the bowl of glitter! You'll need to pay particular attention to the areas with the tape...not much glitter will stick to that area

7. Go get all of the Martha Stewart things you bought in Michalel's out of its packaging. For some reason, I can't find links to any of the stuff we bought (tiny cardboard boxes, cupcake wrappers, grass or adorable note cards) but its in the Martha Stewart craft aisle! 

8. Put your eggs (dried over night) in those cute tiny boxes! Provide appropriate cushioning! 


9. Write your notes, put them in the envelopes and add an instruction list! 


10. Give them to your bridesmaids! This one is Bridget's and I gave it to her at Sidesgiving! Her's definitely exploded the best, and I think that if I did this again I would add way more glitter inside. 

So, there you have it! A foolproof way to ask your bridesmaids to be a part of your special day! I can't believe these turned out as well as they did, and I credit a lot of it to Alyssa's patience and also those Martha supplies! They really made everything look perfect...thanks, Martha!